Fixture-specific
properties
Customize the properties of a fixture by
assigning specific attributes, such as point of view, patch information,
and lens type.
To edit/view fixture attributes
- Select the fixture that you want to view or edit.
- Right-click and select .
Tip: At any
time, to access an object’s properties, you can click the Properties tool
on the Edit toolbar.
 The
Properties button.
The
Properties button.
Result: The
Properties window appears. Based on
the type of fixture that you have selected, the tab fields in the Properties window varies. An example
is shown in the graphic below.

- Layer: A list of
the layers in your document is displayed. Click on a list item to
change the layer on which the fixture will be edited or viewed.
- Display with Layer Groups:
By default, this checkbox is selected to show the list of layers within
groups, and the Collapse All and
Expand All buttons become active.
Clear the checkbox to show only the list of layers.
- Collapse All: Click
the Collapse All button to display
only the Layer Groups.
- Expand All: Click
the Expand All button to display
the Layer Groups and all the Layers.
- Use Layer Color:
Select this checkbox to set the fixture’s color for Wireframe views
to be identical with the properties of the layer on which the fixture
resides. Clear this checkbox, and then use the color box to select
a specific color for the fixture.
- Line Weight: From
the drop-down list, choose the line weight for the selected fixture,
which sets the thickness for the fixture symbol lines, defining how
it will appear in all the Wireframe views and in the printed Layouts.
- Attach to Axis/Frame:
From the drop-down list, select the motion axis to where you want
to attach the selected fixture.
Hatching
Section for managing hatching effects only
for closed objects. See To
add hatching to an object.
Fixture Symbol Fill
Section for managing fill options for fixture
symbols.
- Use Document Defaults:
By default this checkbox is selected to apply the fill settings that
were set in Document Options. Refer
to Fixture
Settings tab. Clear this checkbox if you want to change
the fill and color settings.
- Enable: Select
this checkbox to change the fill settings of the selected fixture.
- Select Percentage from
the drop-down list if you wish to fill using the same hue of the
Fixture Symbol, and set the percentage from the drop-down list
for the hue intensity.
- Select Custom Color from
the drop-down list and click the color box to choose a different
color.
- Select Use Gel Color from
the drop-down list if you wish to fill using the gel color that
was attached to the fixture.
Fixture tab
Options on the Fixture tab
affect the fixture properties and their accessories. On the left side
of the dialog box is a list of the selected fixtures and their accessories.
Click on a list item to obtain further details about the item.
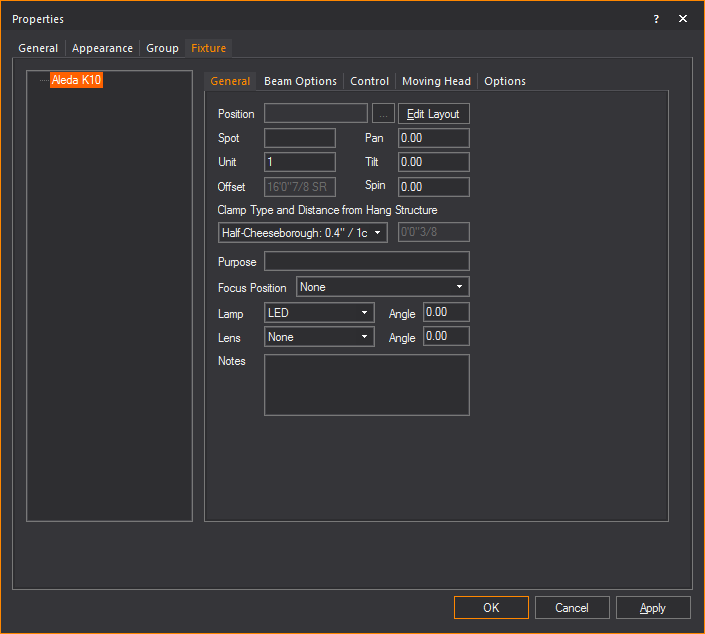
General tab
Refer to Data fields for
a description of the fields.
- Edit Layout: Click to edit the text label layout
for the selected fixture. For more information on layout, see Fixture
attribute layouts.
- Clamp
Type and Distance from Hang Structure: Click on the type of
clamp from this drop-down list to set the distance of the fixture
from the hang structure.
You may click Custom and
then type the value on the adjacent box to set your preferred distance.
Note: By default,
conventional fixtures are set with a C-clamp and moving fixtures are set
with a Half-Cheeseborough.
Beam Options tab
Options on the Beam
Options tab affect the beam and footprint settings for the
selected fixture.
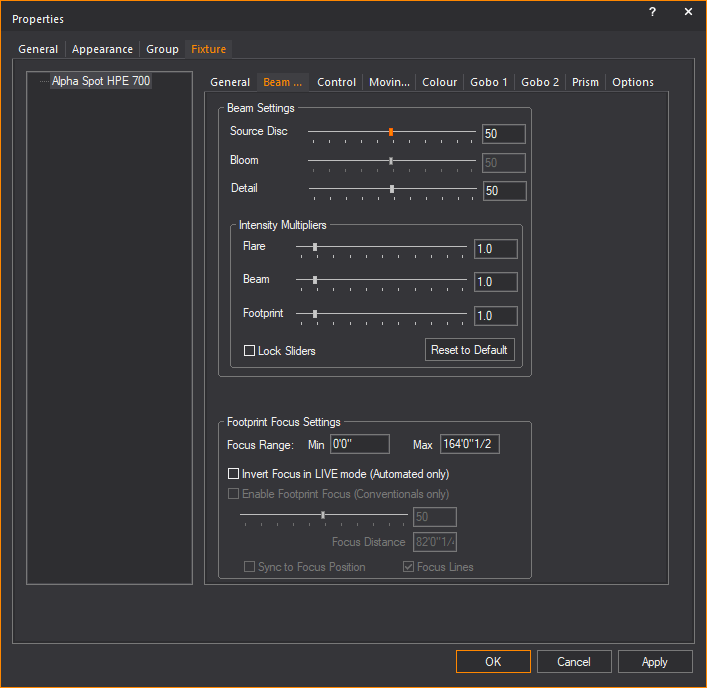
Beam Settings
Use these options to control the brightness
of the fixture’s beam, footprint, or flare when turned on in Shaded view.
The settings here will override the Shaded view > View
Options settings.
- Source Disc: Use
the slider to increase or decrease the brightness of the halo of light
around a fixture's aperture.
- Bloom: Use the
slider to increase or decrease the size and brightness of the visual
bloom effect from the light source of the selected tube fixture or
strip fixture.
The Bloom slider
applies to the tube/strip fixtures from the Library
Browser that are identified with the TUBE keyword
in their name definition. Beam and
Flare are disabled for these fixtures.
The Bloom checkbox and slider from
the Shaded view > View Options >
Visual Effects tab do not affect the visual
representation of these fixtures.
Note: The
Bloom slider feature does not affect Wireframe views or rendering.
- Detail: Use the
slider to increase or decrease the quality of beam detail from the
selected fixture.
Increasing only the beam quality of selected
fixtures will result in a lesser impact on performance compared to the
Detail slider in View
Options > Simulation tab
that affects all fixtures in a scene.
Intensity Multipliers
Use the sliders of these options to increase
or decrease the brightness of the flare, beam and footprint. For example,
to double the brightness of the beam, set the slider to 2.0.
- Flare: Increase
or decrease the brightness of the lens flare for this fixture in Shaded
view. The Source disc will still be visible.
Note: Flare value is NOT passed
to the Renderer when you use the Render Wizard
to render the Shaded view.
- Beam: Increase
or decrease the brightness of the beam cone for this fixture in Shaded
view.
Note: Beam value is passed and will apply
to the Renderer when you use the Render Wizard
to render the Shaded view. If the beam of a fixture does not appear
as bright in the rendering as it should be, increase the value of this
slider - while you keep in mind the Beam Saturation setting
in Step 4 of the Render
Wizard.
- Footprint: Increase
or decrease the brightness of the beam footprint for this fixture
in Shaded view.
Note: Footprint value is NOT
passed to the Renderer when you use the Render
Wizard to render the Shaded view.
- Lock Sliders:
Select this checkbox to lock the Intensity Multiplier settings.
- Reset to Default:
Click to reset the Intensity Multipliers back to the default settings.
Note: All
changes will be applied to all fixtures of this type in the file.
Footprint Focus
Settings
Use these options to control the footprint
focus on conventional fixtures.
- Focus Range: Set
the minimum (Min) and maximum (Max) focus distances for the fixture.
- Invert Focus in LIVE
mode (Automated only): Select this checkbox to invert the direction
of Focus in LIVE mode.
- Enable Footprint Focus
(Conventionals only): Select this checkbox to control the footprint
focus.
- Focus Distance:
Set the focus distance for the fixture.
- Sync to Focus Position:
Select this checkbox to adjust the footprint focus distance to the
specified Focus Position.
- Focus Lines: Select
this checkbox to display focus lines for the selected focus in Shaded
view.
Patch tab
Options on the Patch sub-tab
affect the circuit, channels, and patch universe for the selected fixture.
- Control, Circuit, and
Patch: Refer to Data
fields for a description of these boxes.
- Use DMX address:
Select this checkbox to use DMX address for the patch universe. This
checkbox is disabled if you select from
the Universe drop-down list.
Shutters tab
For information on the Shutters tab, see
To
make shutter cuts.
Moving
Mirror/Moving Head tab
Options on the Moving
Mirror and Moving Head sub-tabs
affect the pan and tilt values.
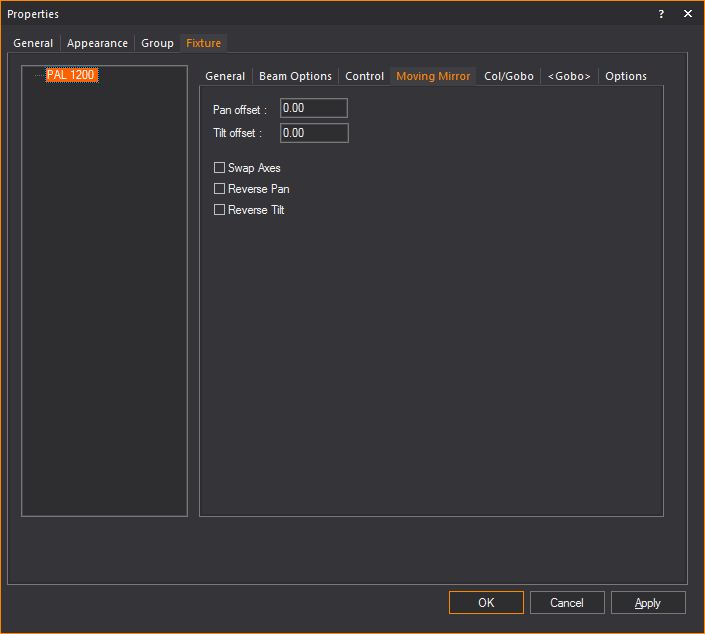
- Pan offset: Sets
the manually adjustable pan angle.
- Tilt offset: Sets
the manually adjustable tilt angle.
- Reverse Pan: Select
this checkbox only if the real fixtures have an option to reverse
the pan parameter and that option is set to true.
- Reverse Tilt: Select
this checkbox only if the real fixtures have an option to reverse
the tilt parameter and that option is set to true.
- Swap Axes: Select
this checkbox only if the real fixtures have an option to swap the
control channels for the tilt and pan and that option is set to true.
- Pan: (Only visible
for certain fixtures.) Displays the manufacturer low, mid and high
pan limit values for the fixture. To change a value, select it, click
Change, and then type the new value.
- Tilt: (Only visible
for certain fixtures.) Displays the manufacturer’s low, mid, and high
tilt limit values for the fixture. To change a value, select it, click
Change, and then type the new value.
Note:
The Pan and Tilt limit behavior is defined by the Mode selected
on the Options tab.
Display Source
tab
Options on the Display
Source sub-tab are used to add a video source to a Video Projection
fixture, so that it can display a video source in the fixture's beam.
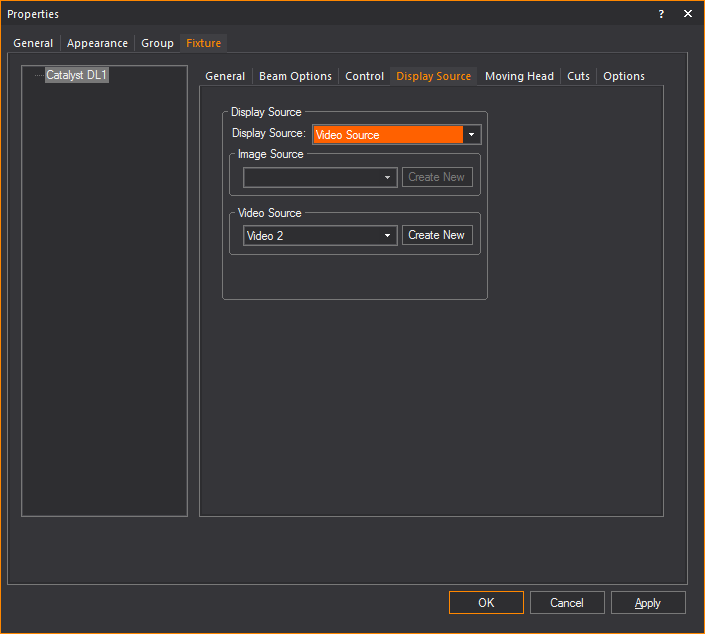
Select the Display
Source.
- To leave the screen blank, select Blank
Screen.
- To show a static image on the screen, select Image File, and then click Browse to
locate the graphic. (The image must be saved in either bitmap or JPEG
format.)
- To attach a video source to the screen, select
Video Source, and then choose the video
source from the drop-down list (or click Create
New to configure a new video source with the Video Manager).
For details on creating a new video source, see To
configure a new video source for streaming video. For details
on creating an I-Mag camera screen, see To
create an I-Mag camera in the Video Manager.
Notes:
Options tab
Options on this tab affect the mode selection
for the fixtures. The options vary according to the fixture that you have
selected.
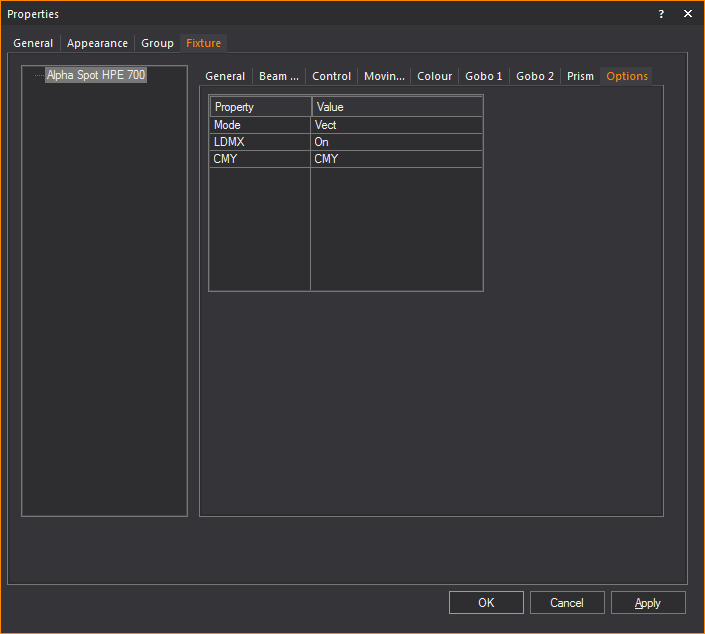
- Mode: Sets the
mode for the selected fixture.
- Software: The software
version that is loaded on the selected fixture.
- Slots: The mechanical
components that are present in the selected fixture.
- Control: Simulates
the lamp control channel on the selected fixture. Since you can physically
turn a fixture on or off, WYSIWYG enables this action in the software.
Note: Fixture
options are displayed in the Fixture Options column
in the >,
and can also be displayed in >.
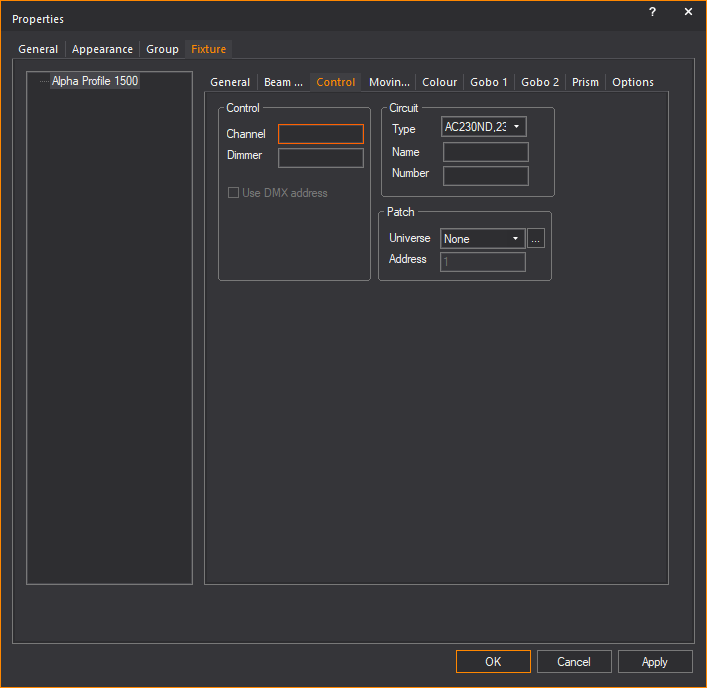
Control tab
Options on the Control tab
enable you to set the channel, circuit, and patch universe information
for the fixture.
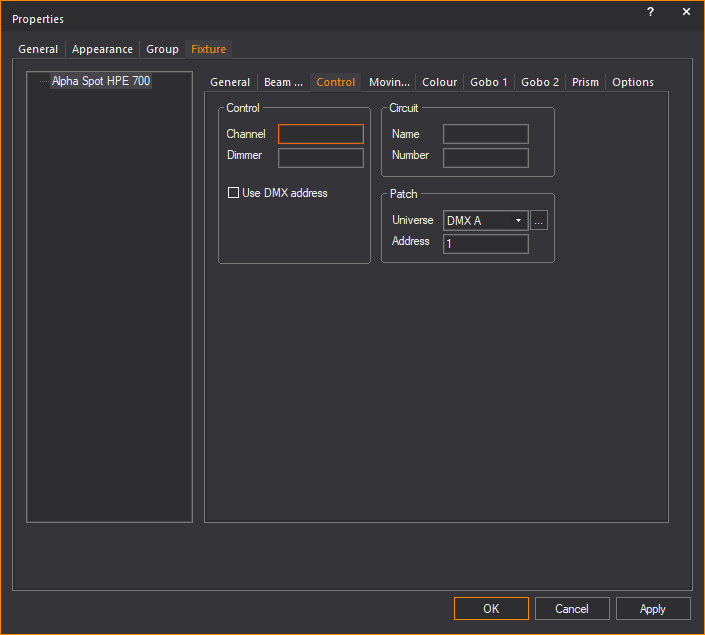
Control
- Channel: Type
the channel number for the selected fixture.
- Dimmer: The dimmer
number for the selected fixture.
- Use DMX address:
Select this checkbox to use DMX address for the patch universe. This
checkbox is disabled if you select from
the Universe drop-down list.
Circuit
- Name: The circuit
name for the selected fixture.
- Number: The circuit
number for the selected fixture.
Patch
- Universe: Select
a patch universe for the fixture.
- Address: The starting
DMX channel number for the selected fixture.