Layers
Layers are drawing aids intended to help
you organize your plot. They are like transparent acetate sheets upon
which you can draw. In the same way that you can view several transparent
sheets at once by placing them on top of each other, you can hide and
unhide layers by choosing which sheets are in the stack. The top sheet
is the layer that new objects are placed on and is called the current
layer. You can also merge layers together if you decide that you need
to combine one or more layers.
To find out the layer to which any object
in your plot is assigned, just hover over the object with your cursor
in any of the Wireframe views. A tooltip appears listing the object name
and its layer. This is especially useful when you are working with multiple
layers, some of which have the same color.
Layers can be organized into Layer Groups
in the Layer Database window. The
Layer Groups feature is enabled or disabled from the Document
Options window. Layer Groups can be created, viewed, modified and
deleted in the Layer Database window.
For more information, see Layer
groups.
Creating layers
To create new layers
- From the menu,
choose .
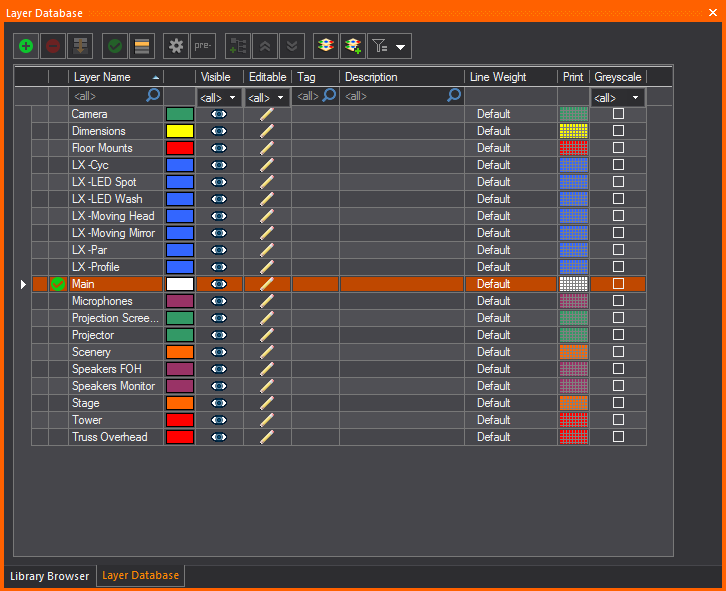
Result: The
Layer Database window appears.
- To create a new layer, click the New icon.
 The New Layer button.

- Type a new name for your layer (for example, “Stage”).
- Choose the color for the objects in the Layer,
from the Layer Color color select
box.
- By default, the new layer is ungrouped but you
may choose to set the new layer as part of a group if available from
the Layer Group drop-down list.
- Choose from the options: (WYSIWYG maintains this
setting for the next layer that you create.)
- Make Current sets
the new layer as the current active layer.
- Add Layer to current
Scene adds the new layer to the current active Scene.
- Add Layer to all Scenes
adds the new layer to all the Scenes.
- Click OK.
- To make a layer and all objects on the layer visible
on the plot and in Shaded view, select the Visible icon.
If not selected, the layer is not visible and is not, therefore, editable.
- To make a layer and all objects on the layer editable
on the plot and in Shaded view, select the Editable icon.
If not selected, the layer is not editable and is not, therefore,
visible.
Tip: You might
want to cancel the selection of a layer when you are finished working
with it to avoid possible errors while working on other parts of the plot.
This is similar to freezing in AutoCAD.
- To change the color of the layer, click Color Select.

Note: It is
recommended that you select different colors for each layer so as to easily
identify the layers on the plot.
Tip: To learn
more about the colors in which objects can appear, see Objects’
colors in WYSIWYG.
- To change the line weight of the selected layer,
choose the applicable thickness from the Line
Weight drop-down list. If you leave Default selected,
the line weight from the Document Options
window is applied to the selected layer. The line weight that
you select applies to all objects on this layer (including library
objects, pipes, and truss) and is visible in all Wireframe views in
all modes.
- To set a different Print Color for a layer (while
preserving the actual Layer Color), choose the color from the Color Select box under the Print column.
By default, the Print Color is set to the Layer Color, and this is
identified by the Color Select box
shown with a checker pattern to identify them as the same. When the
Print Color is set to a different color, the selected color will appear
in the Color Select box.
Note: The
print color will be displayed in Layouts and New Plots when it is set
to a color.
- Select the checkbox on the Greyscale column
to override the color of the layer and display it in greyscale, while
preserving the actual layer color. This will display the layer(s)
as grey, while another layer, which may be more important in the plot,
will be displayed in their color and be more visible in the plot.
- To view the properties of a layer (for example,
name, color, and inventory of objects drawn on the layer), click the
Layer Properties icon. For more
information on these properties, see Layer properties.
 The Layer
Properties button.
The Layer
Properties button.
- Before closing the dialog box, set your current
layer by highlighting it, and then clicking Set
Current. Alternately, you can set the current layer buy double-clicking
in the first column on the left, beside a layer name.
 The Set
Current Layer button.
The Set
Current Layer button.
Note: The
current layer is the layer that you are working on at the moment – any
object that you draw is placed on this layer and assumes the layer's default
properties when it is drawn. A check mark appears beside the name of the
current layer.
- To view and modify the scenes in which a layer
is included, select a layer, and then click Edit
Scenes. For details, see Scenes.
 The
Edit Scenes button.
The
Edit Scenes button.
- Click OK to
close the Scenes for layer dialog box.
Notes:
- To quickly sort the layers within the layer database,
click the appropriate column heading in the Layer
Database dialog box. For example, click the Editable column
heading to sort the layers by edit setting; that is, those layers
selected as editable appear at the top of the list in alphabetical
order.
- How columns appear in the Layer
Database can be edited. The order of columns can be changed
by clicking on a column header and dragging it left or right to the
desired position. By right-clicking anywhere in the table area, a
list is displayed which allows you to show/hide columns as you wish.
On the list, click Layer Groups to show the layers in groups, see
Layer
groups section.
- To freeze columns, right-click on the column
header and select Freeze Columns in
the displayed list. The column that was clicked on and all the columns
to its left will freeze, and will always be visible when scrolling
over horizontally to the right.

Merging
layers
After you add layers, you can merge two
or more of them together if you decide that you need to combine them.
To merge layers
- From the menu,
choose .
- In the Layer Database
window, hold CTRL and
click to select the layers that you would like to merge together.
- With the layers selected, click the Merge
Layers button.
 The Merge Layers button.

Result: WYSIWYG
asks you to specify the Target Layer, or the layer to which the additional
layers will be merged.

- From the drop-down list, select the target layer,
and then click OK.
Result: The
layers are merged, and you will see only the target layer (the one you
chose to merge other layers into).
Layer
descriptions and tags
Once layers are created, descriptions and
tags can be added to the layers to easily sort the layers and show what
they are used for. The Description column can contain a description of
your layer, or any notes you wish.
Note: If you import
an AutoCAD file containing text in its Description column, the text will
be imported into the Description column in WYSIWYG.
To add descriptions and tags to layers
- From the menu,
choose .
Result: The
Layer Database window appears.
- In the Layer Database
window, click in the Description or
Tag field next to the layer you
want to add information to.
- Type in the information in the field.

Result: Descriptive
information is added to the layer.
Layer
prefixes
The prefix tool is used to add a prefix
to the existing name of all the selected layers.
To add prefixes to layers
- From the menu,
choose .
Result: The
Layer Database appears.

- In the Layer Database
window, select the layers you want to add a prefix to.
- Click the Prefix
button.
Result: The
Change Layer Prefix dialog box appears.

- In the Change Layer Prefix
dialog box, enter the prefix you want to use.
- Click OK.
Result: The
selected layers now have the chosen prefix before their name.

Layer
highlight
You can highlight the current/active layer
automatically, by keeping only the current layer displayed in its layer
color while all the other layers are in greyscale.
To enable layer highlight
- From the menu,
choose .
- In the Layer Database window,
highlight a layer.
- Click the Set Current button.
Alternately, you can double-click the column on the left beside the
layer name.
- Click the Layer Highlight button.
 The
Layer Highlight button.
The
Layer Highlight button.
Result: The
highlighted layer is displayed in its layer color and all the other layers
will be in greyscale.
Layer Database filters
When using scenes, you can apply filters
to Layer Database so that only layers
found in the scene will be visible.
To filter the Layer Database
- From the menu,
choose .
Result: The
Layer Database window appears.

- In the Layer Database
window, click the Select Filter icon.
 The Select
Filter button.
The Select
Filter button.
- In the filter list, select Layers
in the Current Scene.

Result: Only
layers in the current scene will be visible in the Layer
Database.
Layer properties
All layers have properties that describe
the appearance of the layer. Objects that reside on the layer inherit
the properties of the layer by default unless you decide to override the
values. For more information on overriding object properties, see General
object properties.
General tab
Options on the General tab
affect the selected layer’s color, line weight, visibility, grouping,
print and render color.

- Name: The name
of the selected layer.
- Description: A
description of the selected layer.
- Visible: Select
this checkbox to make the selected layer visible on the plot and in
Shaded view. If you modify the property here, it is changed in the
Layer Database window.
- Editable: Select
this checkbox to make the selected layer editable on the plot and
in Shaded view. Modifying the property here changes it in the Layer Database window.
- Tag: A descriptive
tag applied to the layer. Used for sorting and categorizing information.
- Line Weight: From
the drop-down list, choose Default to
set the layer’s line weight to the default value specified in Document Options. For more information, see
Document
Options.
If preferred, you can also choose a specific
line weight for the layer. The value is used as the line weight for all
the objects that reside on the specified layer (including library objects,
pipes, and truss), unless otherwise modified. To modify the line weight
of an object, refer to the General
tab.
- Group: From the
drop-down list, choose the Layer Group where this layer will be set
into.
- Layer Color: Specify
the color of this layer to set the color of all the objects that are
displayed in this layer in all Wireframe views.
- Greyscale: Select
this checkbox to override the color of the layer and display this
layer in greyscale while preserving the actual color.
- Print Color: Specify
a different color for objects that reside in the selected layer when
printing the document. Select the Use Layer
color for print checkbox to use the same layer color when
printing the document. When the print color is the same as the layer
color, the Color Select box will
show a grey checker pattern to identify them as the same. When the
print color is different from the layer color, the Color
Select box will show the set color.
Note: The
print color will be displayed in Layouts and New Plots when it is set
to a color.
- Render Color: Specify
a different color for objects that reside in the selected layer when
rendering in Shaded view in DESIGN mode. Select the Use
Layer color for render checkbox to use the same layer
color when rendering objects in this layer. When the render color
is the same as the layer color, the Color
Select box will show a grey checker pattern to identify
them as the same. To modify the object color for rendering, refer
to the General
tab.
- Scene: The scenes
that the layers appear in.
Object Counts
tab
Entries on the Object
Counts tab indicate the total number of objects that reside
on the selected layer. Values on this tab are read-only.

Deleting
layers
You can only delete a non-empty layer that
is selected individually. You cannot delete the current layer.
To delete a layer
- Select a layer that you want to delete.
- From the menu,
choose .
Result: The
Layer Database window appears.
- Ensure that the layer you want to delete is not
set as the current layer.
- Select the layer from the list.
- Click the Delete Layer(s) icon.
 The Delete
Layer(s) button.
The Delete
Layer(s) button.
Result:
- A confirmation dialog appears and clicking Yes deletes the empty layer.
or
- The Warning dialog
box appears if the selected layer contains objects.
- On the Warning
dialog box, click Check Layer Contents
to display its contents.
Result: The
Contents of layer: window appears
showing its contents.

- Click Delete Layer.
Result: The
selected non-empty layer is deleted.
Note: See
Non-empty
layers delete section for deleting rules on non-empty layers.
Tips:
- The Layer toolbar
gives you quick access to all existing layers and the Layers database.
Click the tool on the left end of the Layer toolbar
to access the Layer database.
 The Layers
button.
The Layers
button.
- Use the layer list in the Layer toolbar
to quickly set the current layer. If objects are selected when you
do this, those objects are moved to the selected current layer.
Deleting rules for non-empty layers
You must observe the following rules when
deleting a non-empty layer:
- If you delete a layer that contains any hang structures,
any fixtures that hang from those hang structures will become Unhung.
(As a result, they will appear in the Flight Case and
continue to appear in Spreadsheets, from where you can
delete them if no longer required). This rule ensures that changes
to those fixtures (mode or other options, attributes, FALS, etc.)
are not lost.
- If you delete a layer that contains one or more
Groups, the Groups, and their component objects will be deleted, even
if those objects are on other layers.
If an object within a Group resides on an Uneditable
layer and you delete the Group, that object will be deleted despite it's
layer's Uneditable state. This same rule will apply when deleting layers
that contain one or more such Groups.
- If you delete an object or Group on a layer that
is part of a "nested Group" that is not on this layer, the
object or Group will be deleted but not the "nested Group".
- If you delete a layer that contains one or more
Motion Objects, any objects Attached to them will Detach before those
Motion Objects are deleted.
- If you delete a layer that contains New Plots
objects, all the objects in New Plots will be deleted.
- If you delete a layer that contains an object
associated with Arc Length or Radial Dimension, the dimension will
be deleted when the object is deleted. It does not matter if the dimension's
layer is editable/visible or not. Arc Length and Radial Dimensions
can be deleted independent of the object they are measuring.
- If you delete a layer that contains a focus object,
the link to the fixtures will break.
Note: You
can Undo the deletion. A successful Undo operation will restore the layer
and everything it contained and anything (everything) else that may have
been deleted from other layers.
Layer groups
A Layer Group is a selection of layers
that are organized into a group in the Layer Database window.
One or more layers can be selected and set into a Layer Group with a specified
name. Layer Groups are created, viewed and modified in the Layer
Database window. The Layer Group feature is enabled or disabled
in the Document Options window.
The ungrouped layers, by default are listed
under the group name “Ungrouped”, which can be renamed like any other
Layer Group.
In the Layer Database window,
the position of the “Ungrouped” group of layer(s) can be set to either
top or bottom of the displayed list.
You can also right-click on the Layer
Database window and locate Layer Groups from the list to toggle
the display of Layer Groups in the Layer Database.
Creating
layer groups
To create new layer groups
- From the menu,
choose .
Result: The
Layer Database window appears with
the layer groups enabled and displayed.

- Press and hold CTRL
and select one or more layers.
- Click the New Group
icon.
 The New Group button.

- Type a new name for your Layer Group.
- Click OK.
Result: The
new Layer Group with all its layers is added to the list.
- To make all layers in the Layer Group visible
or invisible on the plot and in Shaded view, select the Layer Group,
then click the Visible icon. All
the layers in the Layer Group will not be editable if not visible.
- To make all the layers in the Layer Group editable
or not-editable on the plot and in Shaded view, select the Layer Group,
then click the Editable icon.
- To change the color of all the layers in the selected
Layer Group, click Color Select. All
the layers in the Layer Group will have the new color.

- To change the line weight of all the layers in
the selected Layer Group, choose the thickness from the Line
Weight drop-down list. If you leave Default selected,
the line weight from the Document Options window
is applied to all the layers in the selected Layer Group. The specified
line weight sets the thickness for all the object symbols in the associated
layers (including library objects, pipes, and truss) in the Layer
Group, defining how they will appear in all the Wireframe views and
printed Layouts.
- To set a different Print Color for the selected
layer group (while preserving the actual Layer Color of the group),
choose the color from the Color Select box
under the Print column. The print color
selected for the layers in the group will be displayed in Layout and
New Plots.
- Select the checkbox on the Greyscale column
to override the color of the layer group and display it in greyscale,
while preserving the actual layer group color. This will display the
layer(s) in the layer group as grey, while another layer, which may
be more important in the plot, will be displayed in their color and
be more visible in the plot.
Note: When
layer groups are set in greyscale, you can change how the objects in the
layer groups will be displayed in the General tab
in Document Options. See the section General
tab.
- On the list of Layer Groups, click the arrow at
the far left of each layer to expand or collapse a single Layer Group.
- Click the Collapse All
button to display only the Layer Groups.
 The
Collapse All button.
The
Collapse All button.

- Click the Expand All button
to display the Layer Groups and all the Layers.
 The Expand
All button.
The Expand
All button.

Notes:
- The use of Layer Groups can be switched off from
the Layer Database window. Right-click
the table area and from the list of columns that appear, clear Layer Groups. This links to the General
tab in the Document Options window
and disables the Enable Layer Groups option.
Only the list of layers will be displayed in the Layer
Database window.
- The order of how the columns appear in the Layer Database can be changed by clicking
on a column header and dragging it left or right to the desired position.
- To show/hide columns, right-click anywhere in
the table area, and then select or clear the columns from the displayed
list.
- To freeze columns, right-click on the column
header and select Freeze Columns in
the displayed list. The column that was clicked on and all the columns
to its left will freeze, and will always be visible when scrolling
over horizontally to the right.
- The ungrouped layers, by default are listed under
the group name Ungrouped, which can be changed, and listed on top
or bottom of the list of layers.
- To change the name, click the name and type the
new name.
- To change the position, right-click anywhere
in the table and click Options. Select
Top or Bottom in
the Grid Options window. You can also
go to the General tab in the User Options section of the Document
Options window. See User
Options.
Layer group descriptions
and tags
Descriptions and Tags can be added to a
Layer Group which will be displayed to all the layers of the selected
Layer Group.
To add descriptions and tags to layer groups
- From the menu,
choose .
Result: The
Layer Database window appears.

- In the Layer Database window,
click in the Description or Tag field in the row of the Layer Group
you want to add information to.
- Type the information in the field.

Result: The
Layer Group and all the layers associated have the descriptive information
added.
Moving layers between
groups
To move a layer from one group to another
- From the menu,
choose .
Result: The
Layer Database window appears.

- In the Layer Database window,
highlight one or more layers you want to move.
- Click and drag the highlighted layer/s (NOT the
active layer) into another layer group where you want the layer/s
transferred.
Deleting layer groups
Deleting the Layer Group will remove the
Layer Group from the Layer Database. All the layers of the deleted Layer
Group will be ungrouped and returned to the Ungrouped group. All the settings
of the deleted Layer Group will be removed from all the ungrouped layers.
To delete a layer group
- From the menu,
choose .
Result: The
Layer Database window appears.
- Select the Layer Group from the list.
- Click the Delete Layer(s)
icon.
 The
Delete Layer(s) button.
The
Delete Layer(s) button.
Result: The
Warning dialog box appears to inform
that the layers in this Layer Group will return to the Ungrouped Group.
Select the checkbox Always move associated Layers
to the Ungrouped Group when a Layer Group is deleted and the
Warning dialog box will not appear again.

- Click Yes.